

Before & After!
Today I wanted to share these garden markers I made for my dad for Father’s Day. When I first saw these on the interwebs a couple months ago I knew right away that I had to make them myself- and since I don’t have a green thumb, I would have to gift them to my dad who does!
Supplies:
Supplies:
- Old spoons – I bought mine on eBay & Etsy (tip: look for sterling silver or silver plated, which are easier to hammer than stainless steel!)
- 2 pound brass hammer
- Thick stamping block
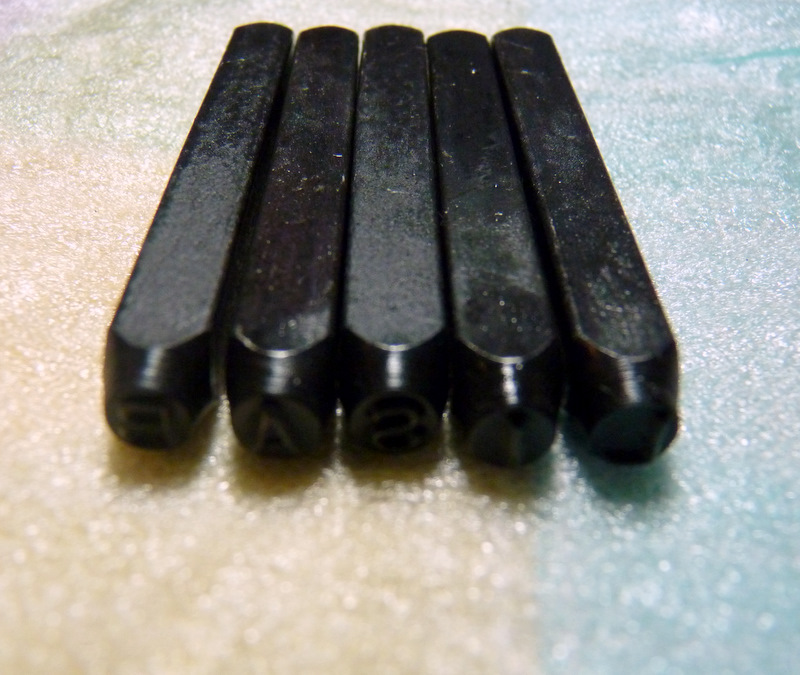
- 1/8” uppercase letter stamps
- Ultra fine 0000 steel wool
- Pro polish pad
- Black Sharpie
- A very solid surface
 |
| In its original grimy condition |
Step 1: Make A List
Before you do anything at all, make sure you know what you’re doing! I wrote out my list of garden items I wanted to stamp on my precious spoons and spelled them all out correctly and carefully to avoid making a mistake later.
 |
| Hammer time! |
Step 2: Flatten Your Spoons
This was the hardest part for me and my lacking biceps- especially with the couple spoons in my supposedly all sterling silver lot that had to have been stainless steel. I went out to the garage to use my work bench, placing the spoon on top of my stamping block. Then I just took that hammer and went to town on it! The key is to be careful not to get your fingers between the spoon and the hammer head. I came out unscathed.
This was the hardest part for me and my lacking biceps- especially with the couple spoons in my supposedly all sterling silver lot that had to have been stainless steel. I went out to the garage to use my work bench, placing the spoon on top of my stamping block. Then I just took that hammer and went to town on it! The key is to be careful not to get your fingers between the spoon and the hammer head. I came out unscathed.
 |
| Flattened |
Step 3: Mark Your Spot
Once I was happy with the flatness of my spoon, I picked my first word- BASIL- and plotted out where I wanted the letters. I used a black Sharpie to mark a dot for each letter. Don’t worry about the Sharpie- we’ll take care of it soon. Then, I took each letter I needed and placed it in front of me.
 |
| Sharpie dots to guide my way |
 |
| B-A-S-I-L |
Step 4: Spell It Out
I started with the letter “S” since it’s smack dab in the middle of BASIL. I figured that in case my dots weren’t spaced out accurately, starting in the middle would keep my word as balanced as possible. Then, I took my letter stamp and placed it perpendicularly to my dot (at a 90 degree angle), held it still with one hand, then took my hammer with my other hand. Giving it one really good whack is most desirable to avoid any slight movement of the letter, but I gave mine a few extra hits due to, once again, my lacking biceps- and it turned out just fine. I finished pounding out my word using this same method. Take an extra second to think about how the letter is going to appear stamped to make sure you don’t stamp anything backwards or upside down!
I started with the letter “S” since it’s smack dab in the middle of BASIL. I figured that in case my dots weren’t spaced out accurately, starting in the middle would keep my word as balanced as possible. Then, I took my letter stamp and placed it perpendicularly to my dot (at a 90 degree angle), held it still with one hand, then took my hammer with my other hand. Giving it one really good whack is most desirable to avoid any slight movement of the letter, but I gave mine a few extra hits due to, once again, my lacking biceps- and it turned out just fine. I finished pounding out my word using this same method. Take an extra second to think about how the letter is going to appear stamped to make sure you don’t stamp anything backwards or upside down!
 |
| Hypothetically you could use other colors too but I haven't tried this yet! |
Step 5: Faux-Oxidation & Polishing
Once my word was pounded out, I took my trusty Sharpie and went over each stamped letter. This stains each letter so that you can see the word more clearly, plus it gives it more of a vintage feel. Then I took my 0000 steel wool and rubbed it down- the excess Sharpie ink comes right off, along with the extra grit and tarnish from the old spoon. The final step was using a Pro Polish pad to give it nice, mirror finish.
Once my word was pounded out, I took my trusty Sharpie and went over each stamped letter. This stains each letter so that you can see the word more clearly, plus it gives it more of a vintage feel. Then I took my 0000 steel wool and rubbed it down- the excess Sharpie ink comes right off, along with the extra grit and tarnish from the old spoon. The final step was using a Pro Polish pad to give it nice, mirror finish.
 |
| After a steel wool scrub... |
 |
| ... then all cleaned up with a Pro Polish Pad! |
I followed these steps for each of my spoons and completed a set of 8, as you can see below!
 |
| Ta-da! |
I've been wanting to explore with stamped metal jewelry and I also thought this project would be a good way to ease myself into that. Can't wait to stamp more stuff!